|
|
|


Moving from 2D to 3D CAD
 Other News
Subscribe to newsletter
Other News
Subscribe to newsletter
| 21 Mar 2019 |

Each week I will guide you through a different stage of the process to create 3D drawings from 2D data. For this example I’m using a relatively simple house plan. In later weeks I will show you how to create rooms more quickly using some of the BricsCAD BIM tools, but for now, all of the commands used are available in BricsCAD Platinum.
If you found your way on to this page, chances are: you’re a supreme master at all things 2D and vector, but when it comes to thinking in the 3’rd dimension you’re at a bit of a loss. If you’re completely new to BricsCAD, I suggest you check out our lessons and come back when you’re ready.
Commands covered in this tutorial:
- EXTRUDE
- DMPUSHPULL
- XEDGES
- SELECTALIGNEDFACES
- TCONNECT
- JOIN
Setting up
The first thing we should do is switch to the 3D or Modeling workspace.
It’s also a good idea to turn on: Quad, DYN (Dynamic Inputs), ESNAP and DUCS (Dynamic User coordinates) and turn off: Ortho.
Start with what you know
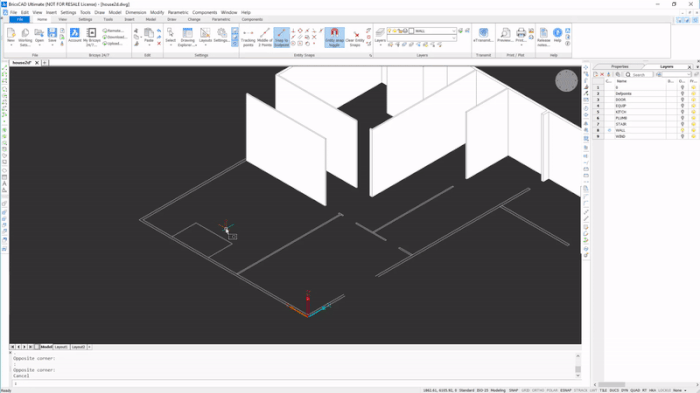
Chances are you have some 2D, vector drawings. Start by importing them into BricsCAD

A 2D plan view I already had in .dwg format
The Walls
To begin I extruded the linework upwards to create the walls.
To do this:
- Hover over your linework, you’ll probably notice that the quad automatically detects the boundary of lines and highlights this in green.
Tip: If it does not, turn boundary on in the Selection Modes toolbar. - You can then use the Quad to select EXTRUDE (also found in the Solids section of the Model tab on the ribbon).
- Small blue boxes will appear (DYN) where you can enter the length and the angle of extrusion.
Note: The extrude function can create both solids and surfaces. Use mode to change between the 2 extrusion possibilities.
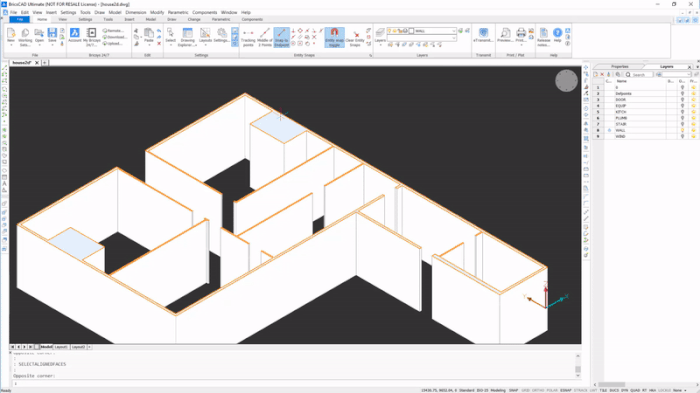
Editing the Height
Once extruded, my walls looked too high. I selected the top off the wall using SELECTALIGNEDFACES then used Push/Pull to change the height.
To do this:
- Hover over the edge of the wall. The vertice will turn orange.
- Hit Tab and the selection changes to the wall’s top surface.
Note: If the cursor is not selecting the item you wish, check the Selection Modes toolbar. - Then use the SELECTALIGNEDFACES command to select all wall edges aligned with the first selection.
- After that, use DMPUSHPULL (Direct modeling section of the Model tab in the Ribbon) to shorten the height of the walls.
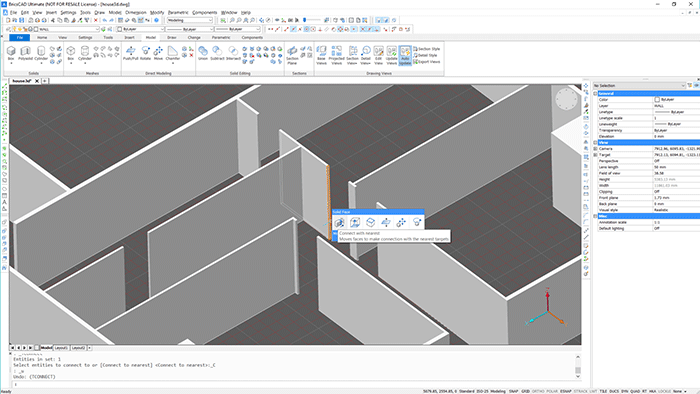
Closing the gaps
The next thing that I noticed was that my building had holes everywhere there was supposed to be a doorway, that would probably make it chilly. Not quite what I was looking for, but easy to fix using Connect with Nearest!
To do this:
- Select the face to edit and use TCONNECT (Connect with Nearest) to extrude the edges of the wall and close the gaps.
Adding the floor
Finally, I used the JOIN command to connect the lines from the edges of the boundary and extruded down to give my building a floor.
To do this:
- Select the lines that make up the edge of the building and use JOIN.
- Then use EXTRUDE to create the floor.
Tip: If you have already got a bit excited and deleted all the lines, you can use XEDGES (Extract edges) to create polylines from a vertice.
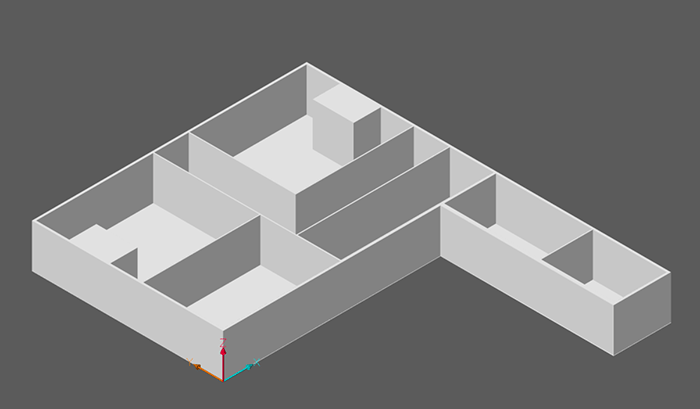
If you followed everything through, you should end up with something that looks like this.
Don’t have BricsCAD yet?
Easy to try, easy to buy, easy to own. That’s BricsCAD. Try all of our products, for free for 30 days at www.bricsys.com. Freedom of choice, plus perpetual (permanent) product licenses that work with all languages, in all places. You’ll love what we’ve built for you with BricsCAD.
Written by Rose Barfield#BricsCAD #CAD #BIM #BIM4DWG #Bricsys #HexagonPPM